Printed Circuit Board production for prototypes - Toner transfer method
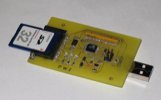
Printed circuit boards using toner transfer method.
While there are many sites on the web describing the toner transfer method of circuit board manufacture, none of them worked exactly as I wanted. The following is the method I have perfected to suit my needs for one off prototyping. (PCB toner transfer method)
Eagle PCB design software from Cadsoft of Germany is used for all the schematic and board design. This allows for schematic design, board design, and routing, including good autorouting. Output is available in many CAM formats, and Postscript is used for the method described here. Cadsoft offers several commercial licenses for Eagle, as well as a "free" version of the Light Edition. The free version, while limited in number of layers, and board sizes, is still very useful for many smaller projects. Note that the free version must be registered for commercial use.
Given a finished circuit board design, artwork must be produced in order to produce a board. In the case of an outside shop producing a prototype or production run, a gerber file appears to be the most widely accepted CAM format. In this case however we are selecting PS, Postscript format. This allows us to print to most linux/unix based systems directly, and in OS X by clicking on the file in Finder, which opens it as a PDF file in Preview. Both these formats can be printed directly without any calibration of a printer. Windows users can print from Acrobat reader in a similar manner.
Remember to allow for an image to be around the right way as applied to the copper, and this might require clicking on the "Mirror" checkbox in the CAM processor depending on whether the tracks are for the top or bottom of the board.
After trying many different types of paper for the toner transfer method, including photographic printing papers, it was decided that Kodak "Everyday Picture Paper", in gloss gave the best results. A5 sized is suitable for any board that can be produced with the free version of Eagle, and covers the size of a majority of prototypes otherwise. If smaller boards are used, and a printer can accept smaller papers, then A6 size may be useful also.
From the point of removing the paper from the packet, to final ironing on of the toner, dust and grease are the biggest enemies of good quality boards.
The bare copper laminate should be cut to size. Of all the methods tried, the fastest and cleanest cut was found using a cut off abrasive wheel attached to an angle grinder. A 1mm thick wheel makes very short work of cutting the board, and with a little care straight cuts can be made by hand, without any mechanical guides. This of course is noisy, and produces some dust in the form of fiberglass and copper. Therefore suitable ear and breathing protection should be worn, in addition to eye protection.
The type of cutting wheel used was Flexovit A46T-BF41, 115x1x22.2mm. and was purchased from a Bunnings hardware store in Australia.
Sharp edges of the board are then removed with file or other abrasive, and any minor scratches are removed with a 1000 grit (or finer) wet-or-dry paper, backed on a perfectly flat surface, like a sheet of glass. If the laminate has any major scratches it should not be used.
After removing minor scratches, the board is polished using a powder cleaner such as Ajax or Vim. Clean in both 2 directions using the powder on a soft cloth and a little water. When the surface is uniform when rinsed, and water does not bead at all after rinsing, the board is ready. From this point on the copper surfaces must not be touched with bare fingers, as even with just washed hands, grease will transfer to the copper.
The board can be wiped free of water with lint free paper towel, then allowed to dry.
After laser printing the finished artwork onto the specified paper, it must be kept free of dirt and dust.
Cut the artwork to about the same size as the board on all sides except one, preferably a long side, to allow handling while ironing it.
A normal household iron was used to heat the paper to transfer the toner. Obviously each iron will have different settings, but a hot setting at around a cotton level seemed to be the best. A common technique mentioned in many of the other toner transfer methods, is to use a large amount of force. This is not necessary, and actually causes poor results when using fine tracks, as the toner tends to get squeezed and flattened. Rather, a firm, even pressure is applied, taking care that heat and the steady pressure are applied to all areas of the board. Remember, that as in a laser printer, it is the heat that causes the toner to melt, and stick to the board. That said, in the cases of both heat and pressure, if a moderate amount is good, a lot is not better. Aside from the flattening of tracks mentioned above from excess pressure, excess heat tends to burn the paper onto the copper, making it much harder to remove. The toner fusing time required is a few minutes.
A laminating machine may allow for better for control of pressure and heat than a household iron, but this has not been tested.
Allow to cool to room temperature, then put into water for about 1 minute. Spray with a general purpose kitchen spray cleaner, (non-solvent). This will help in wetting the paper fibres. Allow cleaner to soak for about 1 minute then put back into water for another 5 minutes or so.
Given the above techniques, most of the paper should peel off with care, leaving only a few patches of paper between tracks, and a thin layer over the tracks. Rubbing gently with fingers will remove much of the remaining paper, while a soft toothbrush gently scrubbed over the surface will remove stubborn paper between tracks.
Of the 2 common etchants available for small production runs, Ferric Chloride and Ammonium persulphate, the latter is preferred in this case.
Ferric chloride is corrosive to many metals at room temperature, and stains many other materials. It may not be legally be disposed of directly down a sink in many areas of the world, gives off HCl when heated, and suppliers will not usually ship it via normal transport methods.
The advantages of ferric chloride are etching at room temperature, and greater amount of copper etched per unit etchant.
Ammonium persulphate is far less harmful at room temperature, and only etches copper at about 70C. It remains clear (though turning sky blue due to cupric ions) throughout the etching process. Care should be taken with Ammonium Persulphate solution that has been used to etch copper as contact with metals such as iron will plate on contact with the solution. A small flat Pyrex dish is useful for an etching bath. Ammonium persulphate can be obtained from Jaycar electronics.
Prepare the Ammonium persulphate according to the instructions supplied with it.
Heating on the lowest setting above an electric hotplate is ample to get to temperature required for etching, and care should be taken not to boil the solution.
Given the correct heat, and gentle constant agitation, the board should be etched in about 10 minutes. The board is then rinsed and dried. It is preferred to drill any holes before removing the toner resist, as it helps in centering the drill, and also protects the tracks during drilling.
After drilling, the toner can be removed with a small amount of acetone. Wrap the board in a single layer of paper towel, pour over just enough acetone to wet the paper completely, and put it in a closed glass or resistant polythene plastic bag for 5 minutes. Then remove and finish rubbing the toner off with the paper towel. Acetone is potentially harmful to internal organs, and should be used with adequate ventilation. Also it will strip oils from the skin, possibly causing dermatitis in sensitive individuals. Disposable polythene gloves should be resistant to acetone for the short time involved. Acetone and its vapor is also highly flammable.
Acetone can be obtained from hardware stores or fibreglass supplies merchants.
Boards with tracks as fine as 7mil have been prepared using the above method, though best results are obtained with slightly larger tracks as a minimum.
The above technique applies to single sided boards. Double sided boards using the toner transfer method will be covered in a future article.
Copyright © 2006, Mark Vitnell
Fri, 30 Jun 2006 23:24 Posted in Electronic construction techniques


